Taking a Client Live
Purpose: Configure billing for a new client on the HyperVerge One Platform so they can go live with production credentials. Audience: Internal operations and account management team. Prerequisites: The client has already been created on the Admin Dashboard and is using the system on staging. See Creating New Clients first if not.
The AE/KAM of the client account is expected to own this process end-to-end.
Overview
To take a client from Active (staging-only) to Live (production-enabled), complete these steps in order:
- Ensure a signed contract is available on HyperStart
- Link the Client ID to the HyperStart contract
- Add module and platform pricing on the Admin Dashboard
- Create production credentials (App ID)
A quick-reference checklist and an exception process are included at the end.
Step 1: Ensure a signed contract is available on HyperStart
Before any billing configuration can happen, a signed contract must be available on HyperStart (the contract management dashboard).
If the contract has not yet been added, this is a compulsory first step — coordinate with the legal team to get it uploaded before proceeding.
Step 2: Link the Client ID on HyperStart
Once the signed contract is available on HyperStart, associate it with the correct client by entering the Client ID from the Admin Dashboard.
2.1 Find the Client ID on the Admin Dashboard
- Log in to the Admin Dashboard. (If you don't have access, see Requesting access.)
- Navigate to the client's profile and open the Client Details tab.
- Locate the Client ID field — this is the unique identifier for the client (e.g.,
mulligan_funding).

2.2 Enter the Client ID on HyperStart
- Open HyperStart and navigate to the client's contract.
- Open the Extracted Terms side panel by clicking the Terms button in the toolbar.
- Scroll down to the Custom Information section.
- Find the field labelled Client ID and enter the value you copied from the Admin Dashboard.
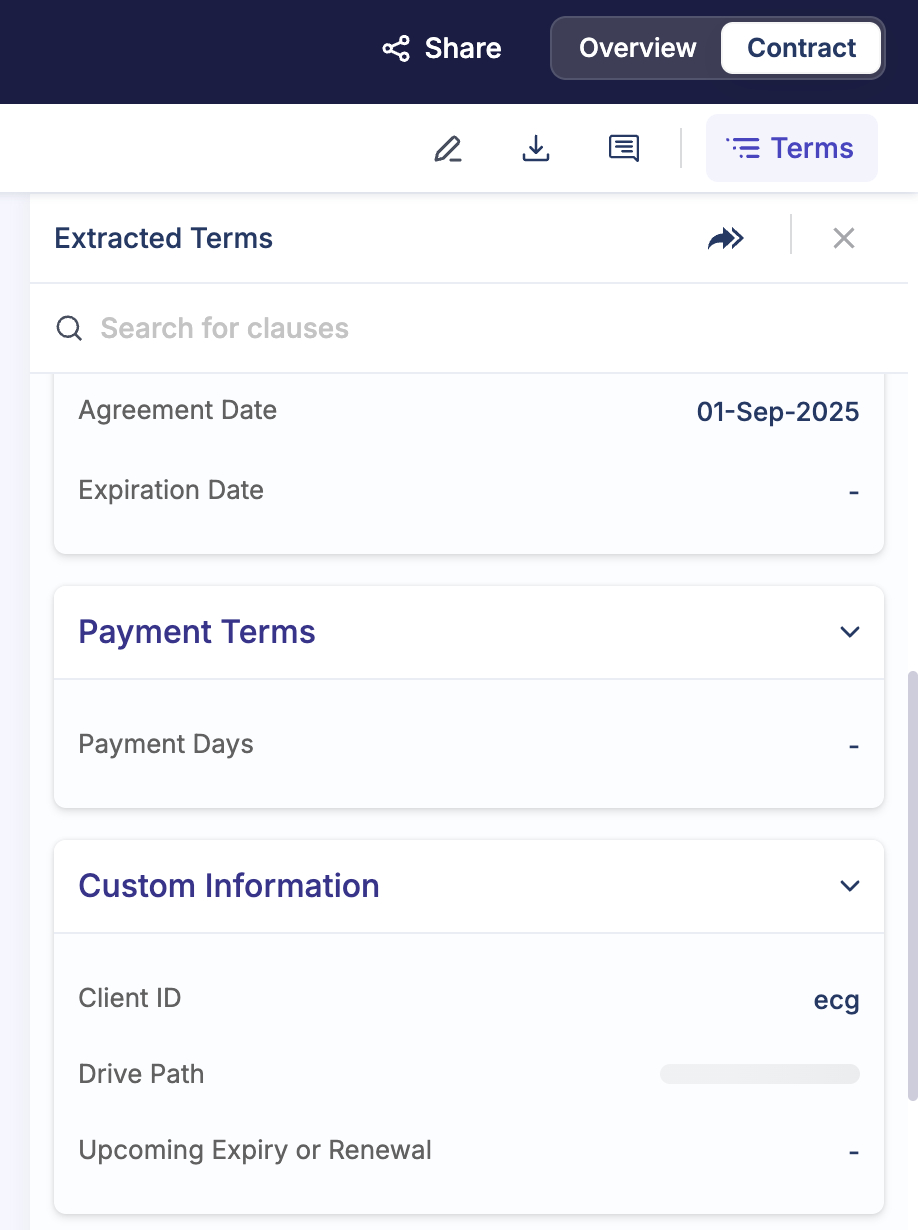
The Client ID on HyperStart must match the one on the Admin Dashboard exactly. A mismatch (including stray whitespace) will prevent the system from linking the contract to the client, which will block production credential creation later.
Step 3: Add pricing on the Admin Dashboard
With the contract linked, configure the pricing for each module and (if applicable) platform pricing and a minimum monthly commitment. All pricing values must match the signed contract exactly.
3.1 Identify modules that need pricing
Before adding pricing, check which modules the client is using and which ones are missing pricing.
- On the Admin Dashboard, navigate to the client's profile.
- Click the Usage tab in the left sidebar.
- Scroll to the Module Billing table. Each row shows a module, its billing unit, billable usage count, and cost. If pricing has not been configured, the Cost column displays "Missing Unit Price" in red.
- Note all modules showing "Missing Unit Price" — you will add pricing for each next.
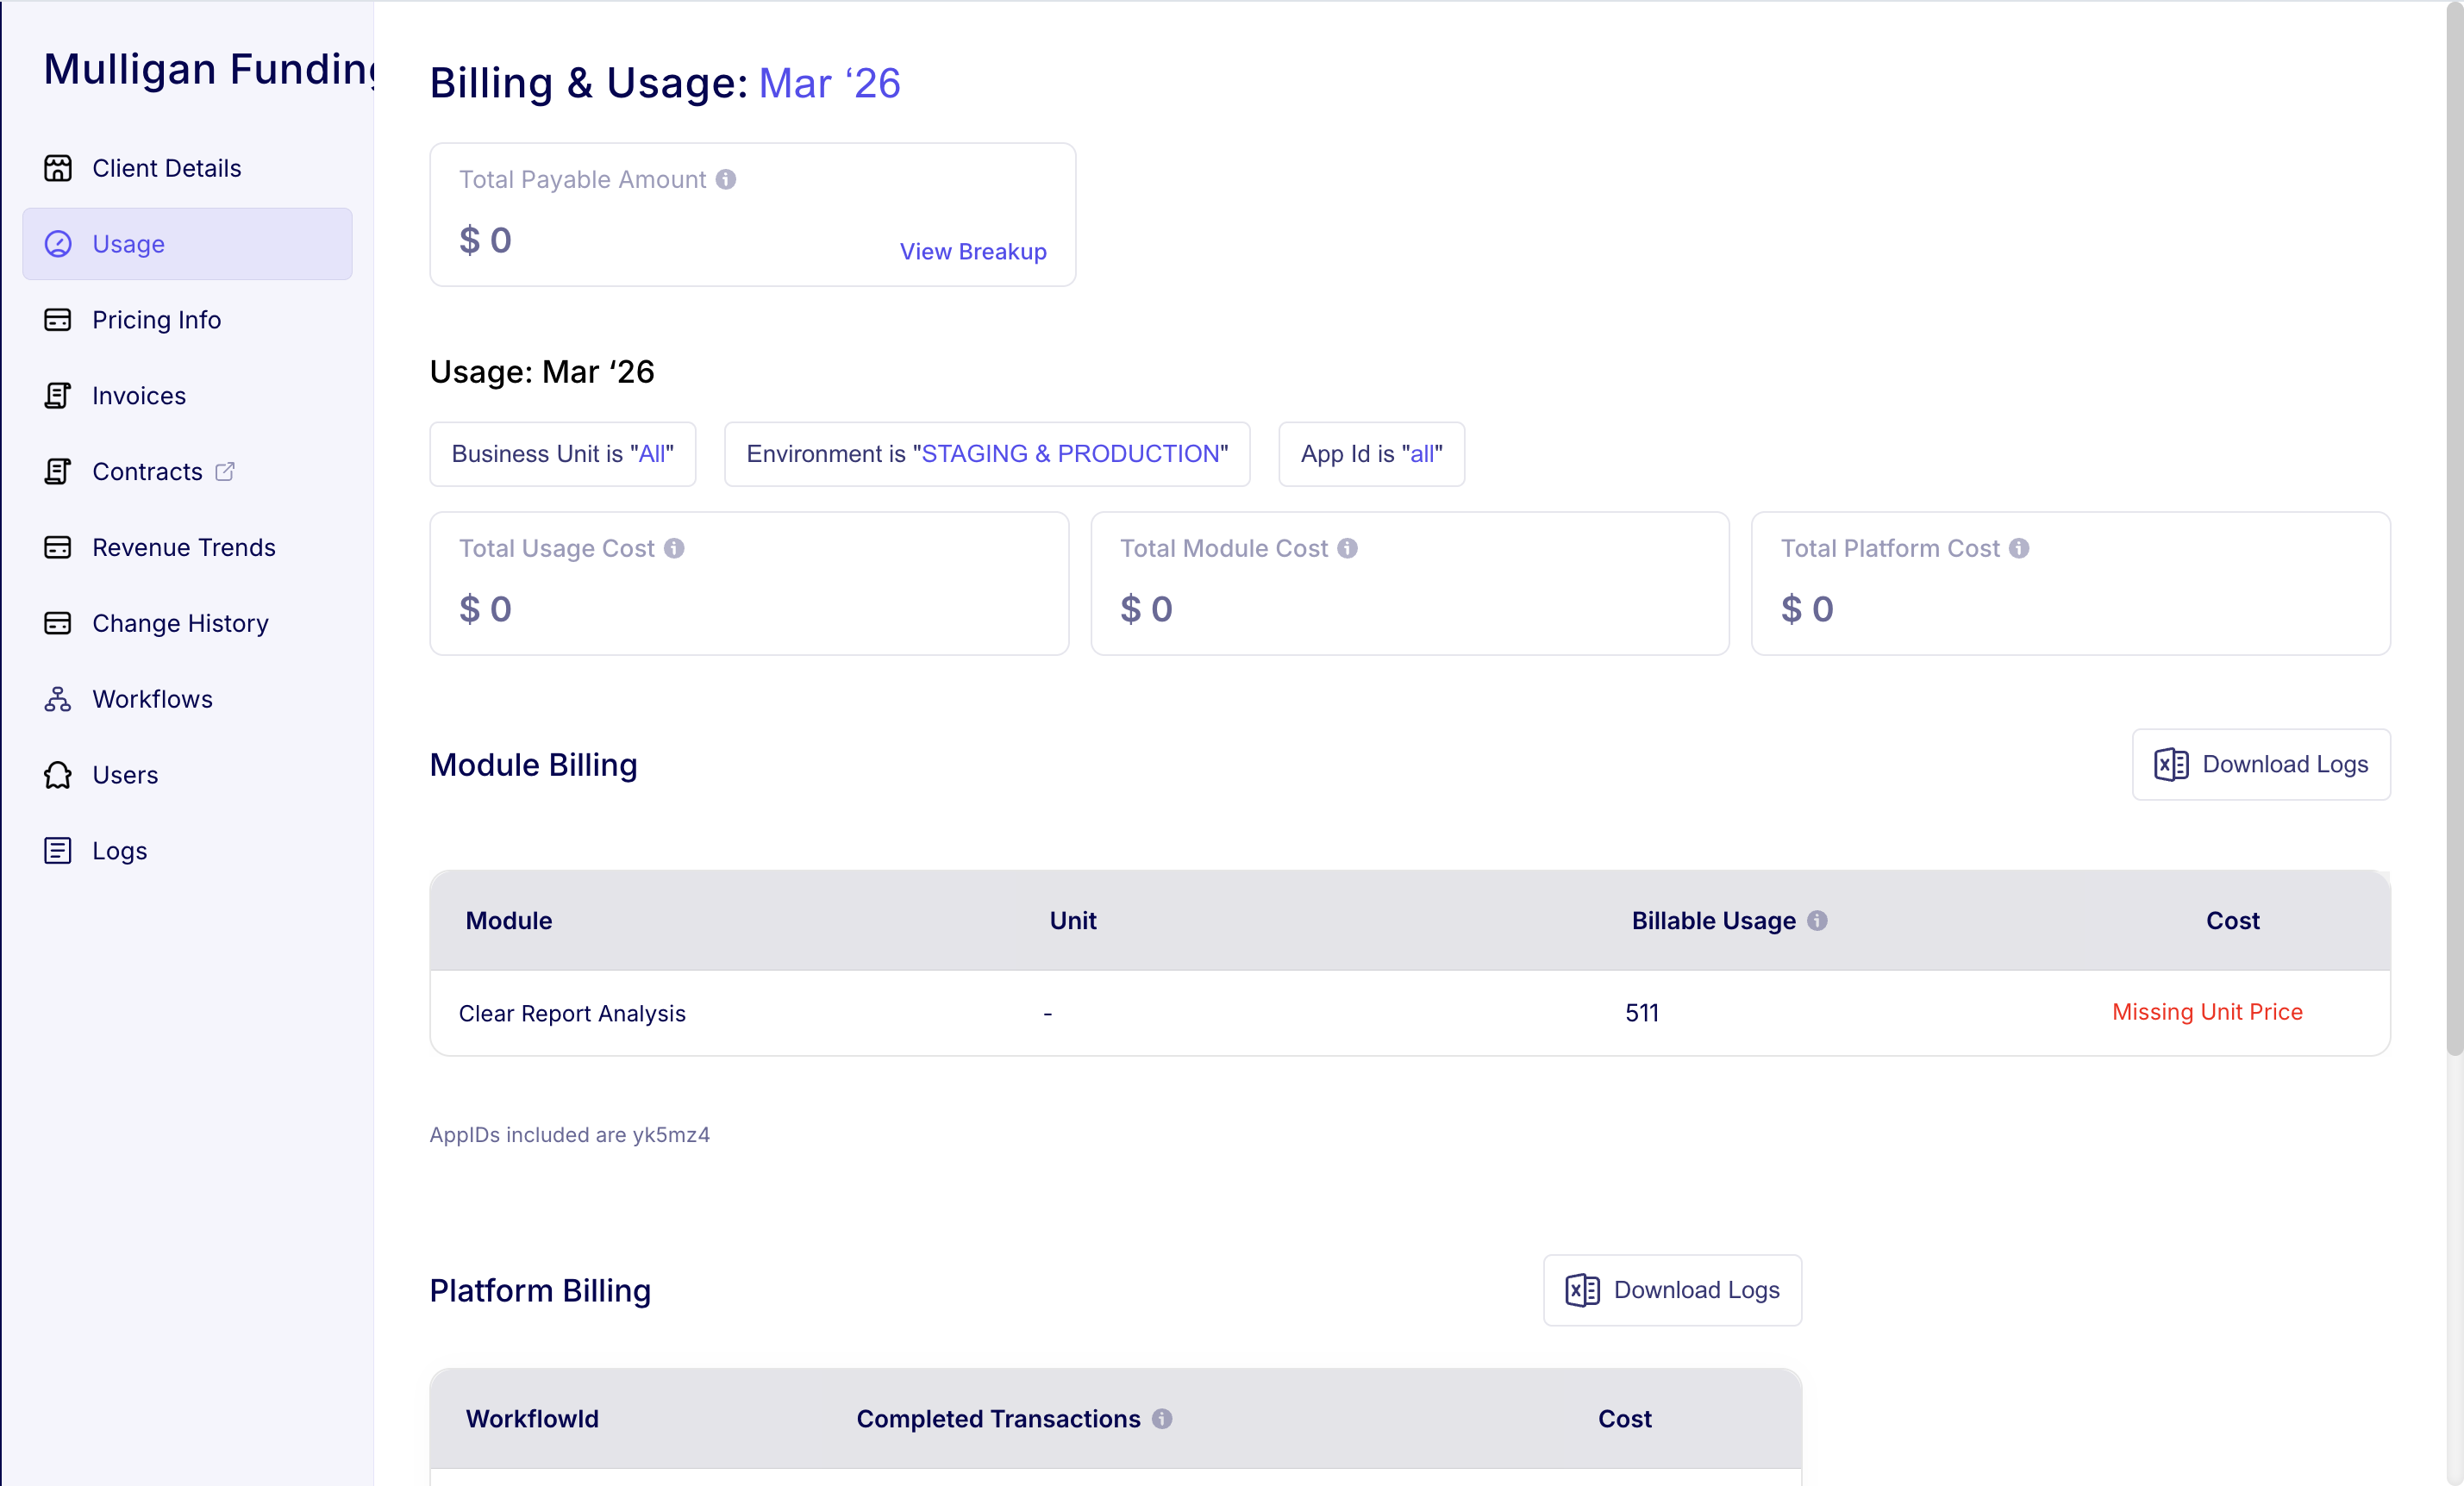
The filters at the top of the Usage page let you filter by Business Unit, Environment (Staging & Production), and App ID. Make sure you've selected the full scope before checking for missing pricing.
3.2 Navigate to the Pricing Info tab
- Stay on the client's profile.
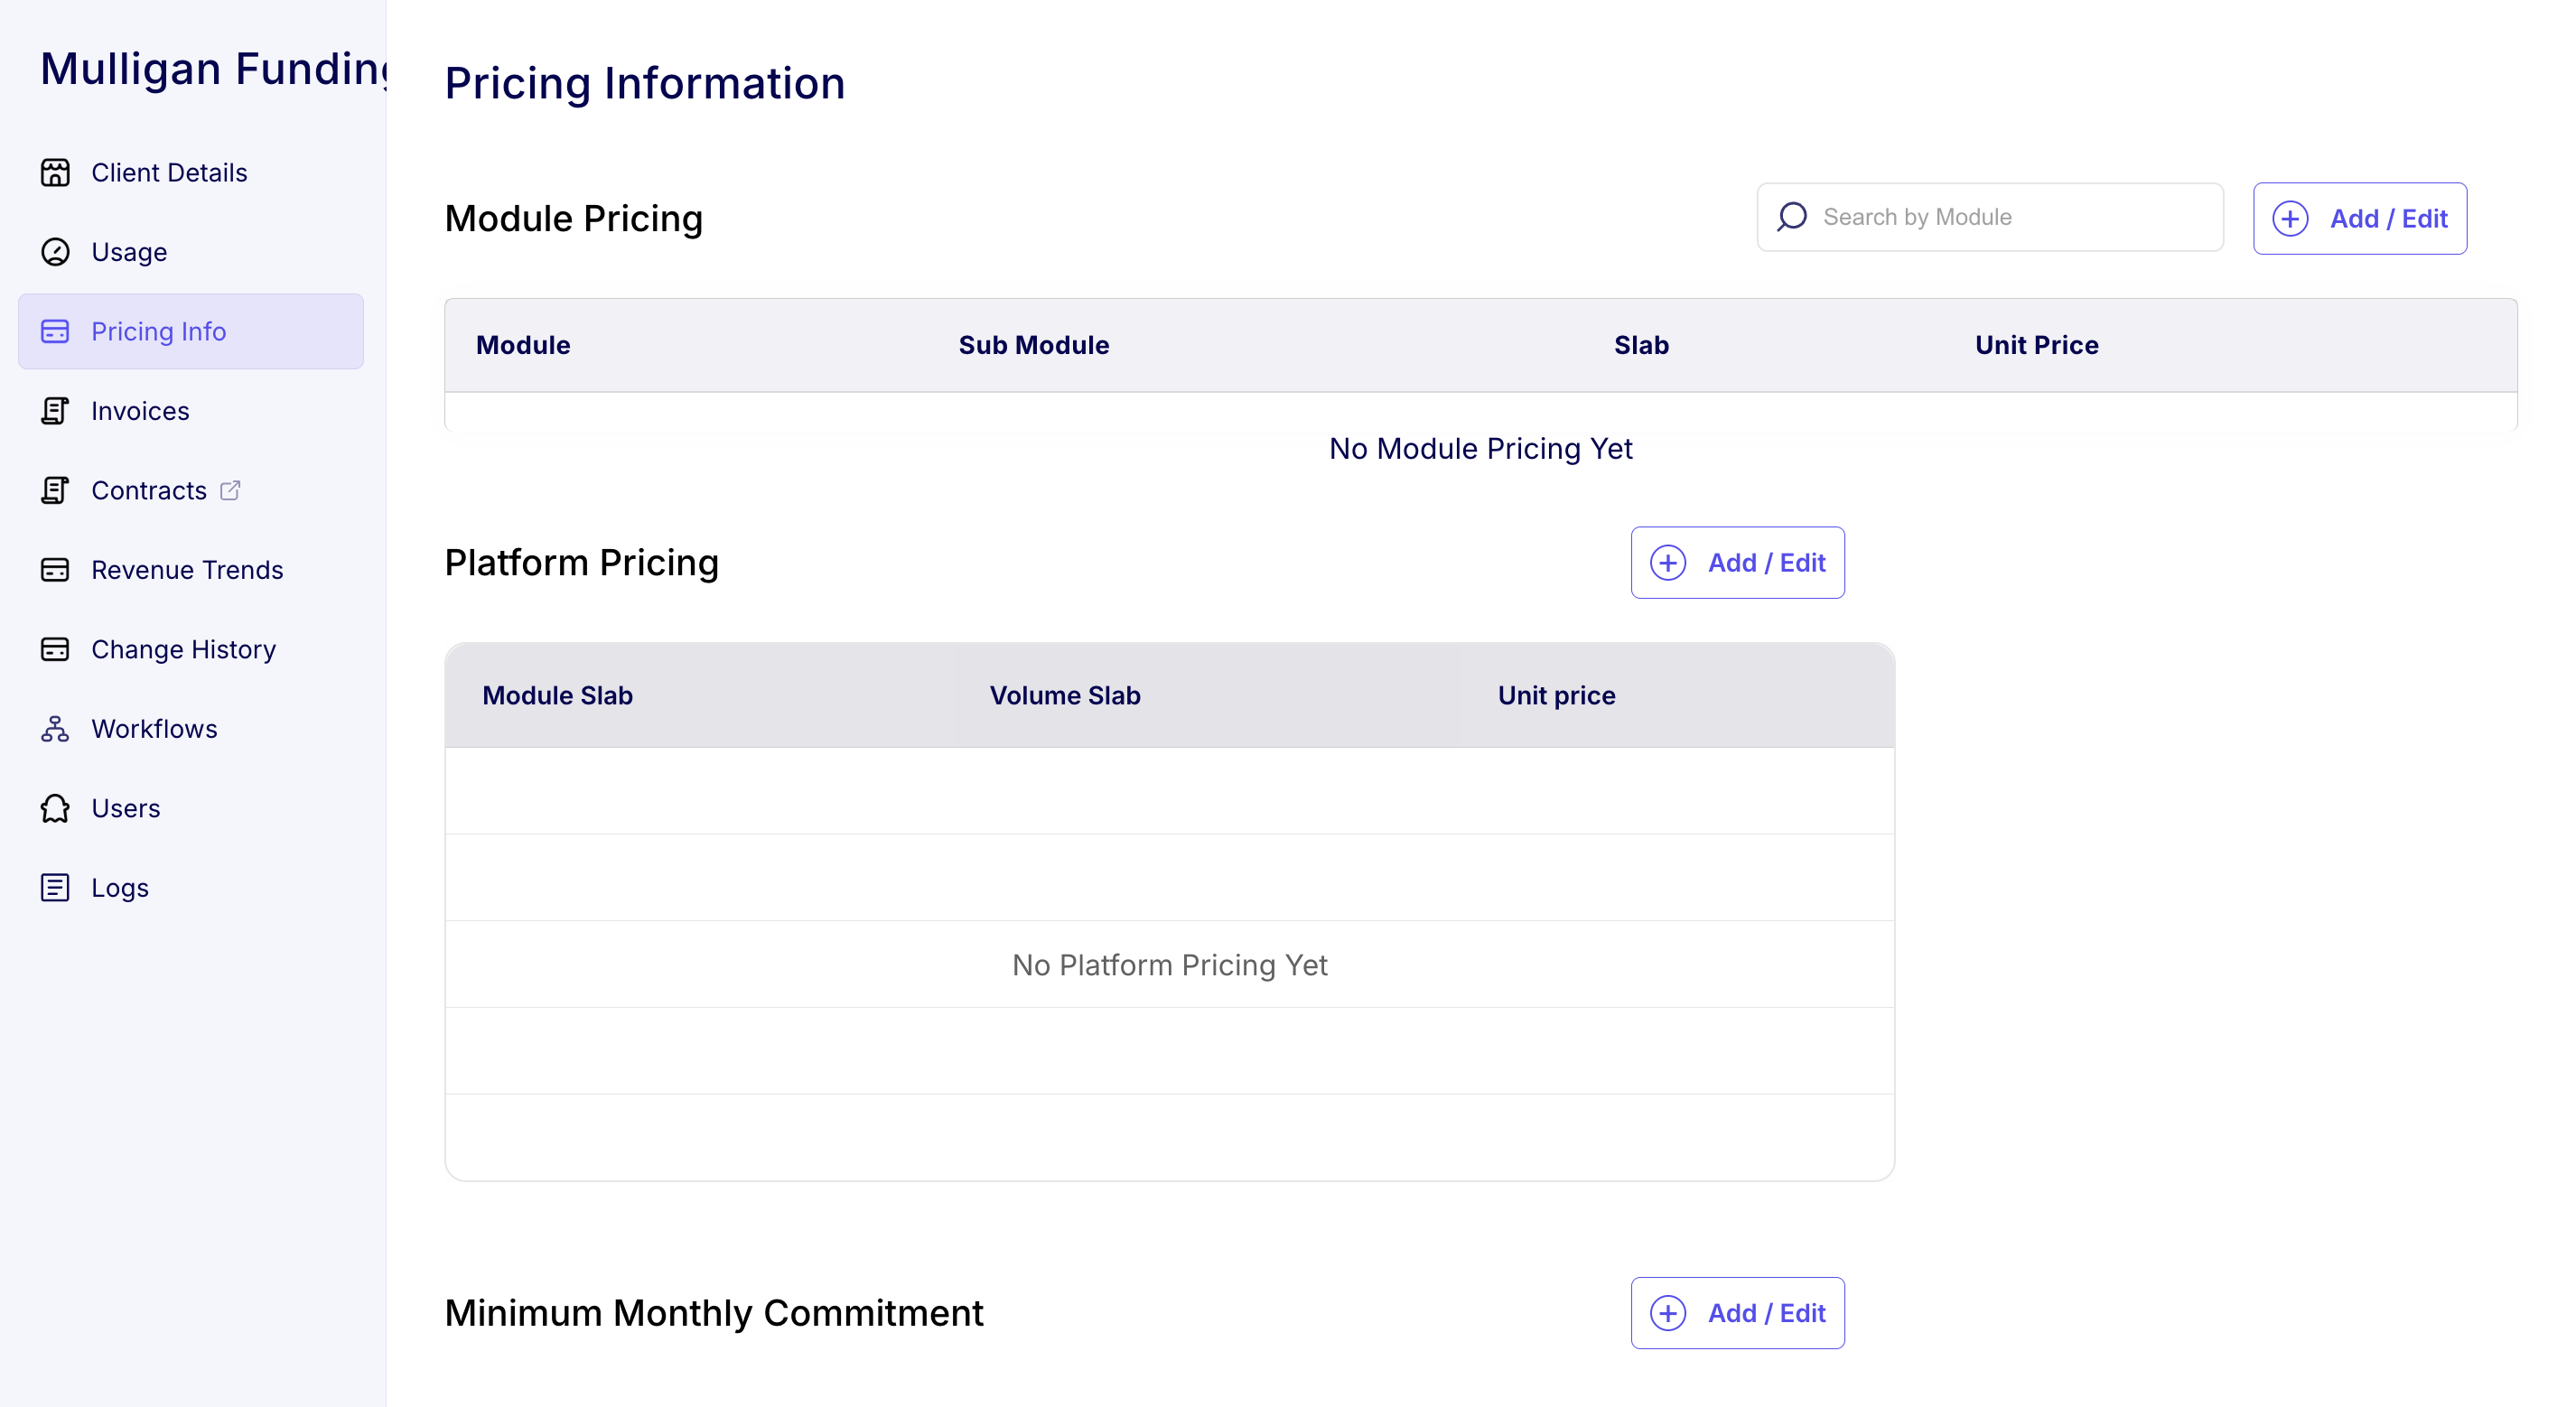
- Click the Pricing Info tab in the left sidebar.
- The Pricing Information page has three sections:
- Module Pricing — per-module unit pricing
- Platform Pricing — platform-level slab pricing
- Minimum Monthly Commitment — minimum billing floor
3.3 Add Module Unit Pricing
-
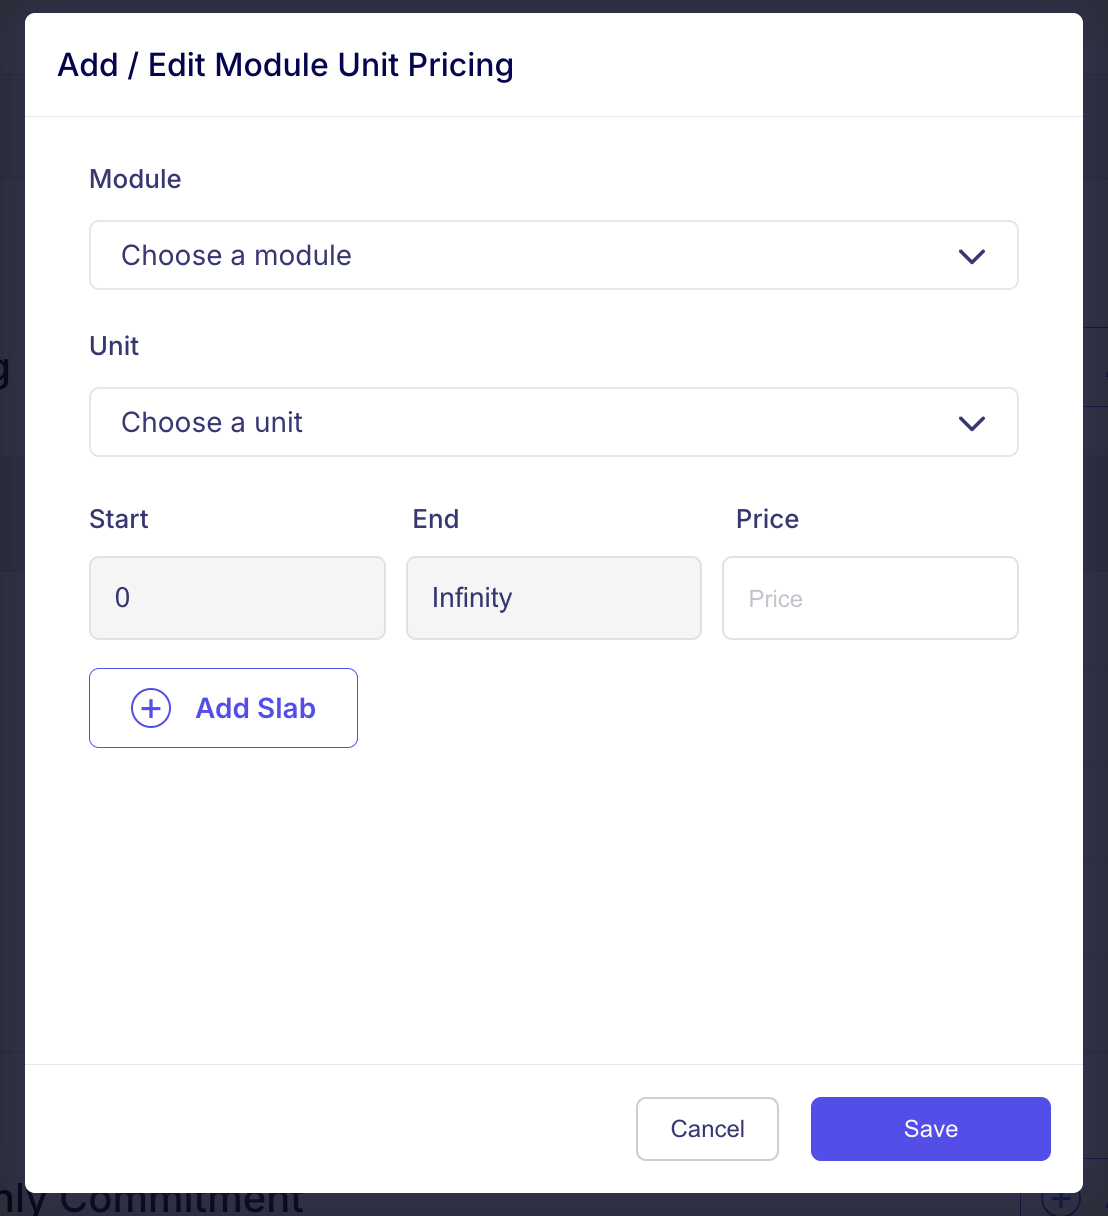
In the Module Pricing section, click ➕ Add / Edit in the top-right of the table.
-
A popup titled Add / Edit Module Unit Pricing will appear with these fields:
- Module — select from the dropdown (matches the module names from the Usage tab).
- Unit — select the sub-module from the dropdown (also visible on the Usage tab).
- Start & End — applicable only when there are multiple slabs for pricing.
- Price — enter the unit price as specified in the contract.
-
Enter pricing exactly as stated in the contract. Do not round or approximate.
-
If the contract specifies multiple volume slabs for a module (different rates for different volume ranges), click ➕ Add Slab to add additional rows and fill in Start, End, and Price for each.
Example tiered pricing:
Start End Price 0 1000 0.50 1001 5000 0.40 5001 Infinity 0.30 How multi-slab pricing worksThe system uses a waterfall method (similar to tax slabs). Each slab rate applies only to the volume within that slab's range — not to the entire volume. For 3,000 transactions with the pricing above, the cost is: (1,000 × $0.50) + (2,000 × $0.40) = $500 + $800 = $1,300. It's not 3,000 × $0.40.
-
Click Save.
-
Repeat for every module that showed "Missing Unit Price" on the Usage tab (unless the client doesn't intend to use the module in production).
The billing currency is automatically set based on the client's geography — INR for Indian clients, USD for non-Indian clients. This is configured at client creation. Verify it on the Client Details page under the Billing Currency field.
3.4 Add Platform Pricing (if applicable)
- On the Pricing Info tab, scroll to the Platform Pricing section.
- Click ➕ Add / Edit next to "Platform Pricing."
- Enter the platform pricing details as specified in the contract, including volume slabs and unit price.
- Click Save.
3.5 Add Minimum Monthly Commitment (if applicable)
- On the same Pricing Info tab, scroll to the Minimum Monthly Commitment section.
- Click ➕ Add / Edit.
- Enter the minimum monthly commitment amount as specified in the contract.
- Click Save.
Step 4: Create production credentials
Once the contract is linked and all pricing is configured, generate production credentials for the client.
- Navigate to the Client Details tab on the Admin Dashboard.
- Click the New App ID button.
- In the dialog, select Environment: Production.
- The system will check that a signed contract exists on HyperStart linked to this Client ID. It will also highlight if any pricing information is missing for modules that have usage on staging — this is a warning, not a blocker.
- If the contract check passes, the system creates the production App ID.
- The client can find the production AppID and AppKey on their HyperVerge One dashboard.
The system allows credential creation even with missing pricing, but once the client starts making API calls in production, any module without a configured unit price will return an error. Completing all pricing before go-live prevents production failures.
Quick Reference Checklist
- Signed contract available on HyperStart
- Client ID from Admin Dashboard entered in HyperStart contract (no whitespace, exact match)
- Module pricing added for every module the client intends to use in production (matching the contract exactly)
- Platform pricing added (if applicable)
- Minimum monthly commitment added (if applicable)
- Production App ID created on the Client Details tab
Exception process: going live without a contract or pricing
In rare cases, a client may need to go live before the signed contract is available on HyperStart, or before unit pricing for a specific module has been configured. This is not the standard process and requires explicit approval.
To request an exception:
- Post a request in #process-contract-exceptions on Slack.
- Include all relevant details — client name, Client ID, what's missing (contract, specific module pricing, etc.), and the reason the exception is needed.
- Wait for explicit sign-off from a member of the SLT (Senior Leadership Team).
This exception path exists for genuine edge cases only. The standard process (signed contract + complete pricing) should always be followed whenever possible.